

So, you’re ready to build an awesome upper receiver for your AR-15? You might wonder how difficult the process is.
Our ultimate guide will explain the process step-by-step in easy-to-understand language. We’ll share tips and tricks learned over the years and tell you why we picked the individual parts. The ultimate guide will discuss two builds and cover the differences in gas blocks, barrels, and handguard installations.
First, you should understand this ultimate guide is only for informational purposes. If you don’t have any experience or the right tools, it’s recommended you take your AR to a gunsmith or purchase a ready-made rifle. You should also double-check your state and local regulations before adding anything to your AR; some accessories are not allowed in some areas.

Table Of Contents
Parts and Tools Needed for Building an AR 15 Upper
The AR upper receiver is what holds all the parts that determine weight, accuracy, and general performance of the completed weapon.

This ultimate guide doesn’t include steps for building a lower receiver; if that’s what you need, check out our guide to choosing an AR-15 lower.
The first AR build is geared toward competitive shooting. Parts for this build include:
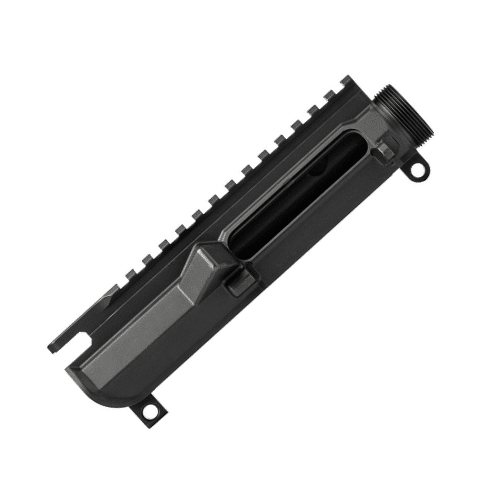
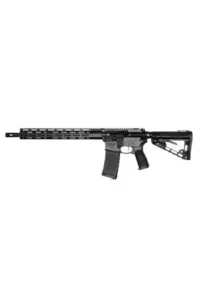
- Aero Precision Stripped Upper Receiver: We picked the stripped receiver, which doesn’t have the forward assist and ejection port cover, so we could talk to you about how to install them later. But, if you don’t really want or need something custom here, you can pay an extra $20 for the assembled unit, and this is less than the sum cost of the added parts. Cost is around $140.
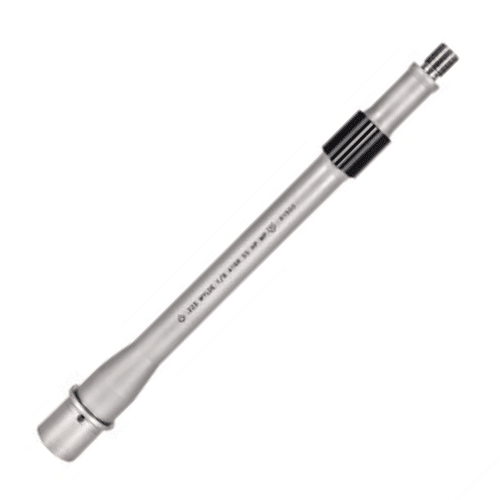
- Ballistic Advantage Barrel: Ballistic Advantage was recently purchased by Aero and they’re gaining in popularity among AR shooters. This barrel ranges in price from $200 to $240. For this exercise, we’re using a 16-inch, light-profile, mid-length, gas chambered in .223 Wylde. This barrel will give you a lighter rifle (0.625 diameter) that shoots more softly (in mid-length) and offers greater accuracy from the .223. It’s also a ‘Hanson’ profile and reduces barrel whip, and the additional gas block is a great touch, too.
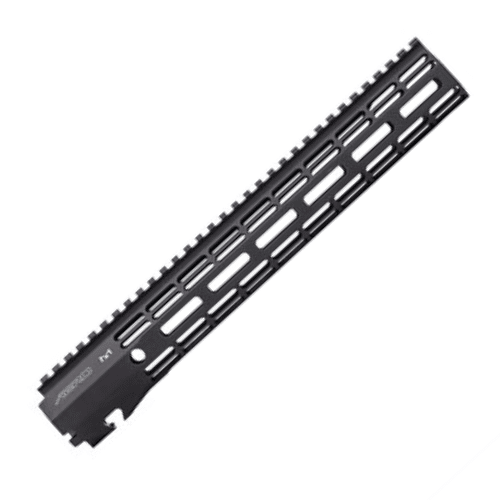
- Midwest 12-Inch G3 Handguard: This is a new version of a favored handguard and it runs from $130 to $350. It’s light, strong, thin, and easy to install, which is always a bonus. For a pleasing overall appearance, we went with the M-LOK version
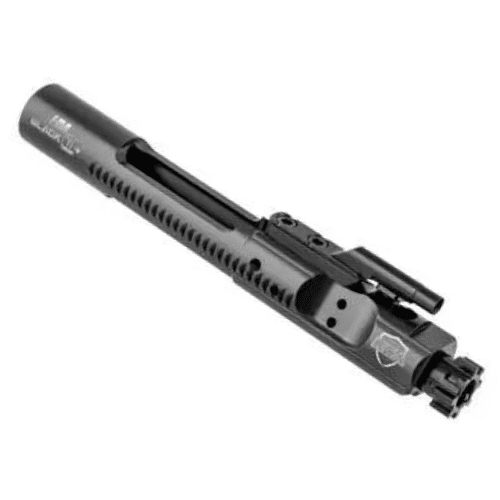
- Rubber City Titanium BCG (Bolt Control Group) and JP Aluminum Light Mass BCG: For a competition build, the lighter titanium and aluminum along with the tuned adjustable gas block will give you a light recoil, since the right amount of gas pressure is used to move the parts back and forth. The Rubber City BCG runs $370, while the JP runs $335.
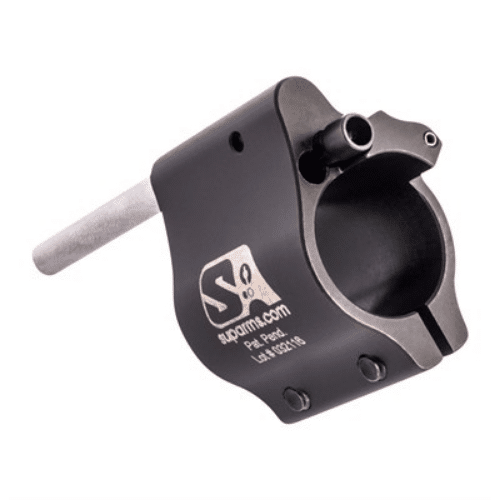
- Superlative Arms Adjustable Gas Block: Though these guys are new to the firearm market, they can’t keep these gas blocks in stock! This one is a clamp-on model for the .625 barrel, so you don’t have to mess with taking off the handguard each time you need to adjust the gas. Another bonus is it shoots the excess gas to the front. The gas block runs around $90.
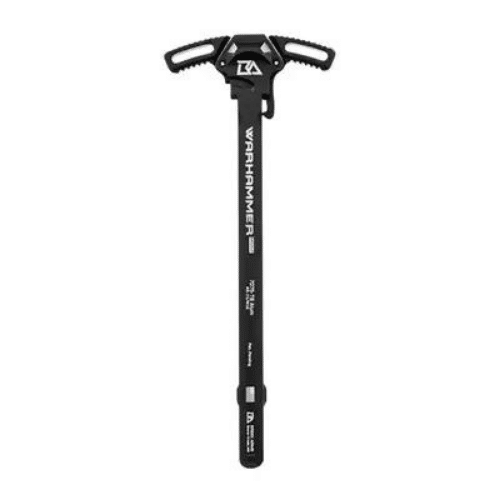
- BCM Gunfighter Charging Handle: You can feel the difference when you rack this, especially one-handed. We like the medium size for its grip, and it’s great that it doesn’t snag on everything. It runs about $50.
- Competition Muzzle Device: For this part, you can grab whatever is on sale and expect to pay around $20.
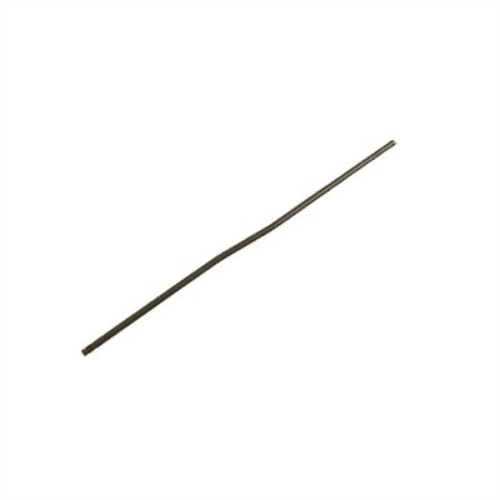
- Spike’s Gas Tube: This one is a mid-length tube. Even though they’re just metal tubes, you should go with a brand name here. It runs around $15.
That’s it for parts! Now you’re ready to gather your tools. As already mentioned, if you don’t have these tools, you should take your AR to a professional for upgrading.
DPMS AR-15 Upper Receiver Block: This is one of your most important tools so you can install the barrel without crushing, bending, or scratching it. If you don’t have one, borrow or purchase one. They run about $40.

Vice: It’s good to have a robust vice, but a clamp-on can work well if you don’t have anything else.
- Punch Set: Brass is best because it doesn’t mar and it’s great for other firearms applications, too. But any punch will work if that’s all you have.
- Hammer: The best are those with rubber or plastic ends, so you won’t mar the finish. A rubber mallet will work, too.
- ½-Inch Torque Wrench: This tool makes sure you get the proper torque when you install the barrel nut.
- Wheeler Torque Wrench: This is excellent for mounting scopes, but it’s also useful to keep the
 torque identical for the gas block.
 - AR-15 Combo Tool: For $52, this tool is useful for lower receiver castle nuts, too.
- Feeler Gauge: To set the gas block exactly 0.025 inches from the barrel shoulder, this tool makes it super easy. But if you don’t have one, you can use something like 2 stacked business cards. This is to allow for an A2 handguard endcap; even if you don’t use the A2, you need to account for it by measuring.
 torque identical for the gas block.
- .223 Headspace Gauge: This will tell you if the headspace on your rifle is accurate. If you buy your barrel and BCG from a reputable dealer, this may not be necessary, but for some people, it’s a small price ($30) for the peace of mind knowing everything is accurate.
First Upper Receiver Build for AR-15
Now you’re ready to start your build. First, gather all your parts and tools and lay them out so they’re easy to get to.
Step One
This is for a stripped receiver. If you purchased an already assembled unit, you can skip the installation for both the forward assist and ejection port cover.
Place your upper receiver in the vice block and get the two sections of the forward assist. When you install the forward assist (FA), ensure the ‘tooth’ is facing toward the receiver. This is what will catch the serrations on the Bolt Carrier Group to make it move forward.
Next, place the block with the receiver in your vice. You might want to put a scrap of cloth or paper towel in the vice to prevent marring. Put the FA in the correct position and tap the roll pin with a punch.
You must press the FA in while inserting the pin, so the raised part gets caught by the pin and keeps all the rest in place. You might need a third hand for this step, or you can use the hammer to gently tap the pin far enough so the FA doesn’t come off. Then, finish it off with the punch.

Now, you’re ready to install the ejection port. If you’re lucky, the pin already has the C-shaped snap ring on it. If it doesn’t, you’ll have to use pliers to install it. Beware: we call them ‘swear clips’; because that’s exactly what you do with the thing flies out of place and across the room! And believe me, it will do just that
Place the ejection port and slide the hinge pin so it shows inside the middle, exposed area. Take the spring, long end toward you and toward the table, and twist it 180 degrees. Place it in that middle area and push the rod through it. It should have proper tension and will want to stay open when properly installed.
If you bought a barrel with a gas block already installed, you’ll have to remove it because you’re adding an adjustable gas block. Just for fun, we weighed this 16-inch barrel at just about 22 ounces. For frequent, long-term use like competition shooting, a lighter rifle means less pain by the end of the day, something any shooter will appreciate!
Install the barrel with the index pin fit into the receiver. A tiny bit of gun oil can make this slide in more easily. Get your barrel nut and put it on the barrel. To make the surfaces mate up easily, you can grease or oil the threads at this point.
Most handguards come with the tool that fits the barrel nut, so there’s less need for the AR Combo Tool. But, you’ll still need the torque wrench. It goes into the square hole on your included tool so you can get the necessary tightness.
You should first set the torque to 35 in-lb and loosen it. Then, do this once or twice more. This gives you better seating later on. What you do next depends on your style of handguard. The new Midwest handguard doesn’t have any pesky issues with alignment like some of the older guards do.
Sometimes, it takes a superpower to make the gas tube fit straight on with the gas block and the index ‘U’ of the barrel nut. But, since we’re using the Midwest G3 handguard, set the torque to 50 in-lb or so (the maximum is 80 in-lb) and finish it up.

Now, get the gas block and gas tube. One side of the gas block has a bigger hole for the tube. This goes face down when you insert it in the gas block. The bigger hole will match up with the holes on the side of the gas block.
To start the roll pin, squish one end with pliers so it makes a smaller point and lightly tap it so it grabs the gas tube. Put the whole thing in the vice to finish the pin. If you’re concerned about marring your finish, you can put some cloth or plastic over the vice jaws.
Slide the gas tube over the barrel. Align it with the words on your barrel (looking straight down on the barrel). If you don’t have words directly in the center of the barrel, mark it using the gas hole as a guide. Also, mark the middle of the gas block so you can match them up later. You can use a 0.025-inch spacer to adjust the gas block for the best fit.
Now, grab your Wheeler torque wrench and set it to 35 in-lb (this is according to Superlative Arms; check your own gas block for the specific requirements). Now your torque is even all the way.
Next, install the Midwest handguard’s hardware. Then, place it on the receiver. It should be perfectly aligned. Make sure the index pin is completely flush at the bottom. Install your muzzle device. If it came with crush washers, put the smaller side toward the barrel. Please, use the crush washer! Make sure you have the top holes aligned and the large ports on the side. This way, most of the gases will vent to the side and some to the top to counter muzzle lift.

If it came with crush washers, put the smaller side toward the barrel. Please, use the crush washer! Make sure you have the top holes aligned and the large ports on the side. This way, most of the gases will vent to the side and some to the top to counter muzzle lift.
Lubricate your BCG (bolt carrier group) and the charging handle. And you’re done!
Second Upper Receiver Build for AR-15
This build will introduce you to some parts that are different from those in the first build, though these parts are common in many upgrades. This includes a barrel nut with the gas tube alignment tabs and a set screw-based gas block.
We’re doing this build as a SPR (special purpose rifle) with more attention to accuracy rather than weight and speed (like the first example). For this, we used the following parts:
- Aero Pre-assembled Upper: We’ve already discussed adding the forward assist and ejection port cover, so here we can use the pre-assembled upper here. It runs about $115.
- Rainier Arms 18-Inch Intermediate Length .223 Wylde Ultramatch Barrel: This longer barrel gives a round more velocity and the length provides a softer shot. The Wylde chamber also adds accuracy. It’s expensive at $380, but worth it.
- Intermediate Length Gas Tube: Match this to the barrel gas system.
- Rainier Arms Night Rail 14-Inch: The matching Rainier night rail looks just awesome and it’s a great addition to your build. We went with the M-LOK at 14-inches to get extra length for a bipod. It runs around $250.
- Atlas Bipod: It costs $220, but is the best you can get.
- Seekins Adjustable Gas Block: It’s not quite as good as the Superlative Arms; it’s a little tough to change the gas amount.
- Bolt Carrier Group (BCG): This is an SPR build, so a normal BCG will be sufficient for your needs.
- Competition Muzzle Device: For around $20, you can get the stainless steel version that matches and has three ports on the side and at least 2 on the top.
There are some differences in this build, so let’s go over them.
First, the handguard has a different type of barrel nut, but it comes with its own tool. Use your torque wrench to tighten it to 35 in-lb a couple times. This handguard has the gas tube alignment notches. Before you tighten it up the last time, make sure to use the gas tube so it comes out straight.
If you’re going under 30 or over 80 in-lb on your build, you must use barrel nut spacers. Slide them in front of the barrel nut and the difference in thickness will make it work. There’s also a second part that goes in the barrel nut. You should thread this on before the gas block. It’s what lets you tighten the handguard at the end of the build.
This barrel is dimpled, so it works well with a set screw gas block (instead of a clamp on). To verify that you have the set screw in the dimple, tighten it down away from your intended point first and measure the distance. When you tighten on the dimple, you can make sure the set screw moves deeper.
You don’t need to use the feeler gauges since the set screw goes into a dimple, but if you have a clamp on gas block, or if you just want to double-check, you can use the gauge here.
This isn’t a typical handguard. Just remember the second nut; you tighten the holes with the included rods. This keeps the handguard in place. Now you’re finished with that step!
Install the muzzle device using the straight edges for a wrench (or a screwdriver through the larger ports on a non-branded unit). And you’re done!
Conclusion
Now you’ve seen two complete AR-15 upper receiver builds. This guide provides all the steps necessary to build the upper receiver. If you’d like to look at some lower receivers, check out our article: The Best AR Lower Receiver (No Matter Your Budget).
The AR-15 is one of the most versatile rifles on the market. And part of the fun of owning one is the customizable ability of the weapon. You can change almost anything to make the gun fit your needs. This includes the upper receiver, lower receiver, handguards, triggers, and barrels. The possibilities are almost endless!
Have you tried building your own AR-15 upper? Please let us know what parts you used and how it turned out in the comments below.


One Response
Just wondering but have you ever noticed that the Spikes “spider” looks like a demonic figure. 2 horns on the head with 2 eyes . the neck then the body. 2 arms and 2 legs . you have to look at that very carefully on the spikes the other 2 arms and 2 legs do not actually connect to the body . When you look at the spider hold it like it is standing upright . you will see