As I’ve said before, there are a lot of great AR-15s out there at a variety of price points, but maybe you’re like me and you want to get your hands dirty and try your luck at making one of your own. Building a fancy, customized precision sniper rifle is something that can be done by hand, but it might take some time and money. For the more frugal beginner who wants to learn how to build an AR-15 on a budget, I’ve got you covered.
Today, I’ll show you just how simple it is to build a dependable AR 15 at home for hundreds less than what you would spend on a pre-built model. All you need to do is accumulate everything you need separately, from the upper receiver to the lower receiver to the trigger to the magazines and so on.
Before we jump into it, let’s go over just what you’ll need when planning for your AR-15 build.
Unpack This Article's Arsenal
Get Great Guns And Ammo Deals!
SAFEST NEWSLETTER - WE WILL NEVER SELL YOUR EMAIL
No Spam - No Selling Your Email
Things to Consider When Building a DIY AR 15
- Cost of Parts
- Cost of Tools
- Overall Time
Cost of Building an AR 15
The first thing you should think about is the price of the parts necessary for your build. The various components that comprise the AR-15 are the essential area of consideration as this is what will make your build functional.
Next, you’re gonna want to carefully select the tools that will be required to build your rifle. Tools can get pricey and if you blow your whole wad on them, you likely won’t have enough left over for parts and accessories.
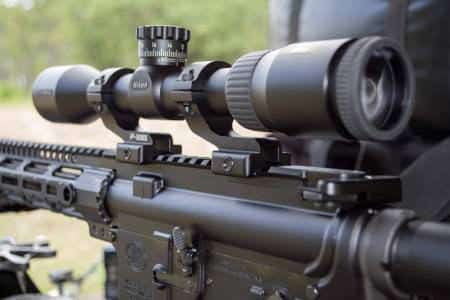
When I built my first AR-15, I made it a point to take inventory beforehand to make sure I had some tools around the house that could work for my build. In this way, I was able to save on cost, ensuring that I would have dollars left over to pick up a good scope and some custom handguards.
The Right AR15 Tools
On the other hand, if you spend too little on tools, you may find that you are unable to complete your AR 15 build. For this reason, this is a paramount step in the DIY process.
Finally, you want to consider how much time it’s going to take you from concept to design. This means factoring in the time it will take you to properly research and order parts, tools and accessories; how long it’s going to take to study the how-to process; how long preparation of your work area takes and how much time will be taken up completing the actual build including getting the best scope for the job.
For a budget build, you’ll definitely want to keep an eye on how much you’re spending since your end game is to build a model that is significantly cheaper than most preexisting AR-15 models on the market.
Best Kit for How to Build an AR 15
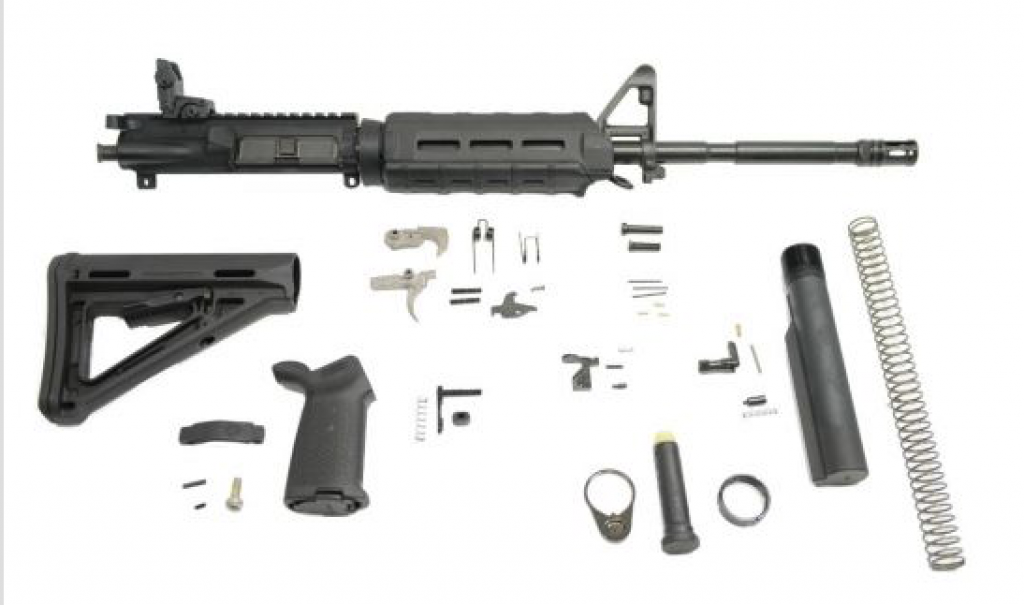
PSA 16″ CARBINE-LENGTH M4 5.56 NATO
My go-to AR rifle kit for a budget build is Palmetto State Armory’s M4-style carbine kit. It sells for around $450 and it’s got all the mil-spec parts you’ll need to complete your build save for a lower, a mag and a rear sight.
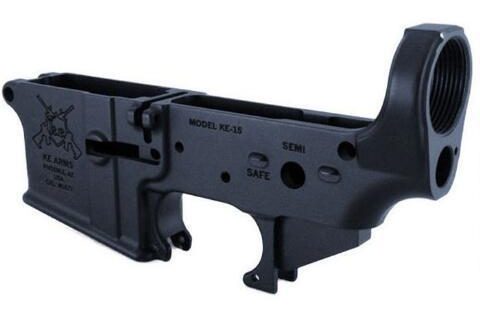
The parts that are absent from the kit can be easily obtained online. Cabela’s offers a stripped lower receiver for just under $50.
CMMG AR-15 Lower Receiver
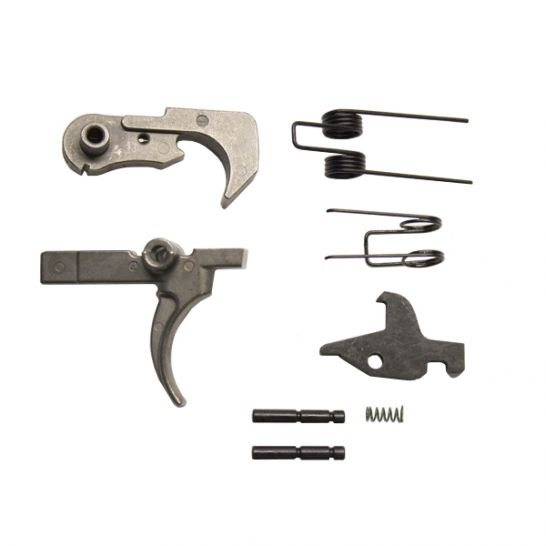
However, PSA offers a similarly priced lower parts kit that includes a mil-spec trigger that has an 8 lb 9 oz trigger pull, so I think you’ll agree that it’s not too hard to find a reasonably priced lower or lower kit.
That being said, Cabela’s also has you covered in the sight department, selling a pair of Magpul MBUS sights for as little as $39.99. And speaking of Magpul, they’ve also got a super-affordable, crush-resistant polymer magazine for just under $13.
AR Build Trigger Upgrade
If you’re looking for a trigger upgrade, PSA has an EPT upgrade at a sale price of $29.99. You get a government-grade fire control group and a nickel finish, amongst other things. It’s definitely worth the scratch for the smooth trigger experience.
PSA AR15/PA10 EPT Trigger Kit
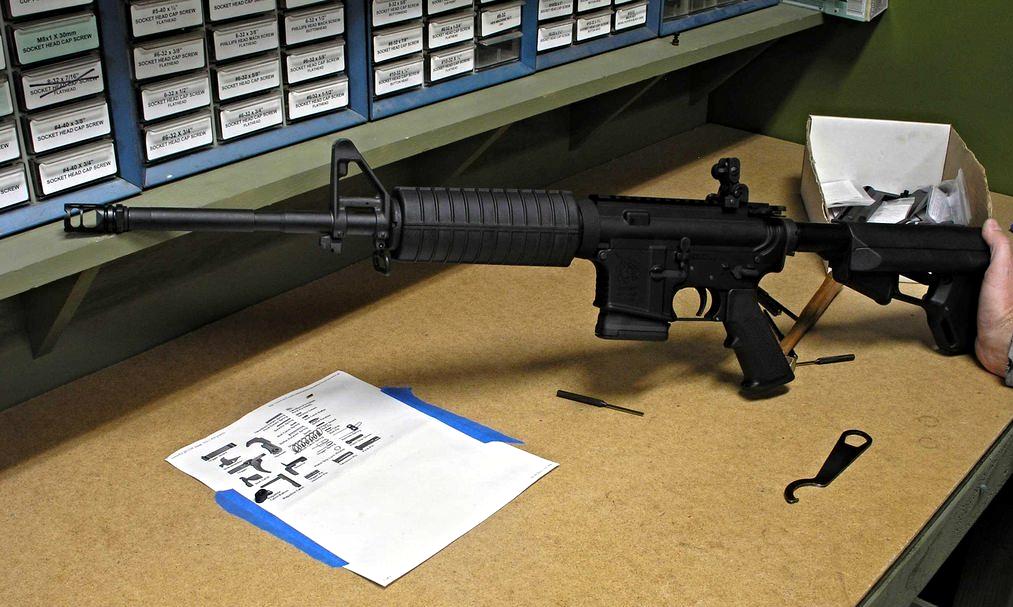
If you’re an avid gun enthusiast, I’m sure you’ll recognize some of the tools that come in standard AR-15 kits. They include a front sight block, a torque wrench, an upper vice block clamp with a gas tube alignment tool, a ring tool, a roll pin installation tool and an adjustable receiver link.
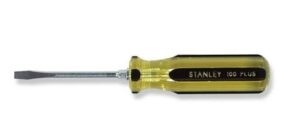
For a budget build, you don’t necessarily need all of these tools (though it doesn’t hurt to have them). A budget build can typically be tackles with a small ball peen hammer, a good multi-tool or a pair of needle nose pliers, a 3” flat head screwdriver, a small drive pin punch and a torque wrench for tightening the castle nut.
When I went with the basic tools for the job, I ended up spending under $200 and completed my build in a small window of time. It is not uncommon for a home build to take eight hours or more, but when you go with the bare essentials, you’ll see quicker results.
How Long Does it Take to Build an AR 15?
By breaking it down to the fundamentals, I was able to create a ready-to-shoot AR-15 in just under 90 minutes. And that was after lubricating everything. By now, I trust you can see just how easy the DIY process can be.
You’ll want to build an AR that’s calibrated to fire a 5.56/.223 round. But keep in mind that you can also customize it to fire 300 blackout rounds or .308 rounds. Alas, that will be pricier if you decide to go that route.
AR-15 Build Essentials
There are six key elements to your AR-15 profile—the lower receiver, the upper receiver, the gas system length, the barrel, the BCG (bolt carrier group) and the handguards.
AR Lowers
There are four distinct variations on the lower. They are the billet aluminum lower, the cast aluminum lower, the forged aluminum lower and the polymer lower.
While I’ve never owned an AR with a cast aluminum lower, I can tell you from experience that the polymer variant is much lighter than most alternatives. Some people were initially worried that a polymer design would be weak at the front hinge pin, there is no reason to believe that this is the case.
People have claimed that it can break at the buffer tube threading, but I think that’s absolute bosh. I’ve never experienced this myself and don’t ever expect to. What this boils down to is people refusing to accept change.
If you’re concerned that a polymer lower isn’t time-tested, you can do plenty of research online before selecting one. There’s no shortage of testimonials in gun forums and the like.
Budget AR 15 Lowers
If you’re on a seriously tight budget, you can always go with a cast aluminum lower. They’re affordable when they’re pre-made and can be made at home for some substantial savings. Cast aluminum lowers are forged from molten aluminum that is poured into a mould.
AR Uppers
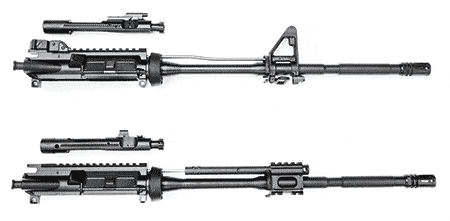
The uppers are a tad more complex than lowers; there are two distinct systems in an AR—a direct impingement system and a piston system. The standard M4 AR-15 model typically has a direct impingement system.
Direct impingement is a gas-operated system by which high pressure gas from your cartridge being fired is utilized to power a mechanism that excretes your spent casings and chamber a fresh one.
With a piston system, your piston is fixed to the bolt group and circulates through the whole operating cycle.
The direct impingement system is favored by most AR owners due to its lighter weight and potential for pinpoint precision. On the flip side, the piston system also has its advantages; they are generally cooler, cleaner and more adaptable in terms of calibers.
Bear in mind, this is a budget build that we’re attempting so we’ll want to go with the direct impingement system because it’s the more affordable option.
AR Gas Systems
Now, let’s talk about gas system length. Choosing the right gas system is integral to the AR platform because it determines the level of action you’re gonna get out of your firearm. For there to be adequate force to cycle that action, the bullet must still be in the barrel when gas hits the bolt carrier.
Since your bullet is in constant movement, there needs to be an appropriate barrel length remaining so the bullet leaves the muzzle after a sufficient amount of gas has been transferred to the bolt carrier. Without that length, it just won’t work. Plain and simple.
If you have too much barrel, the bolt will end up with too much gas which will inevitably result in leakage. Such leakage can damage the functionality of the entire system. On the other hand, if your barrel is too short, there won’t be enough force to unlock your bolt.
AR 15 Barrels
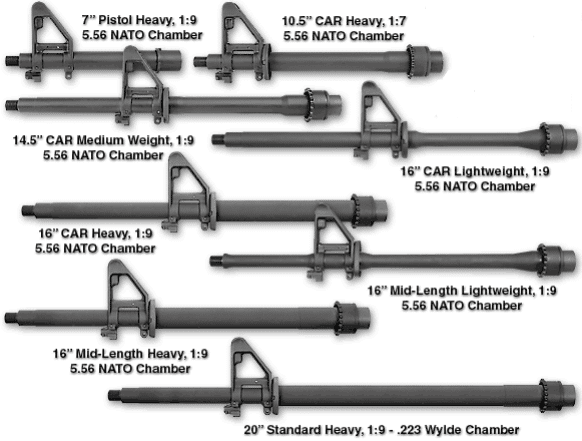
Since the AR-15 barrel has grown shorter over time, we need to place the gas port closer to the muzzle. For a Carbine gas system, you want a 12-16” barrel length. 16” is pretty standard, but that doesn’t mean you can’t go a bit shorter should you so desire.
What Length of AR 15 Barrel Should You Use?
It’s a good idea to stick to 12-14 inches because the 16 can cause some substantial backpressure if combined with a silencer. This poses a problem if you’re a big game hunter who wants to take down an animal without giving up your position.
However, many people prefer the 16” barrel length because it results in less recoil and smoother cycling. Ultimately, it’s entirely up to you. This is your build.
While most barrels are chrome-lined, you can also find stainless steel barrels. With stainless steel, you’ll achieve better accuracy, but the chrome lining has its benefits as well. Fore one, they’re easier to maintain and, furthermore, they tend to be more durable.
The chrome-lined barrel generally offers more longevity than the stainless steel variant, but they both have their advantages. As always, our readers should do their homework before deciding on the one that’s right for them.
AR Twist Rates
Rifle barrels ordinarily have a 1:7 or 1:9 twist rate, but the stainless steel variety often has a 1:8 twist rate. 1:8 is ideal for 55 grain which will save you money since 55 grain ammo is an affordable choice compared to heavier grains.
Earlier I mentioned barrel length, but another consideration may be barrel thickness. There are three different barrels you can choose from—standard M4 barrels, lightweight contours or heavy duty barrels.
Obviously, the lightweight one is going to be…well, lighter. And the heavy duty option will be the longest lasting because of its durability, but since we’re talking about a budget build here, I strongly suggest you stick with a standard barrel.
If you’re looking to get the most out of your AR, be sure to budget for your barrel. It’s one of the most important parts of your rifle.
AR Bolt Carrier Group
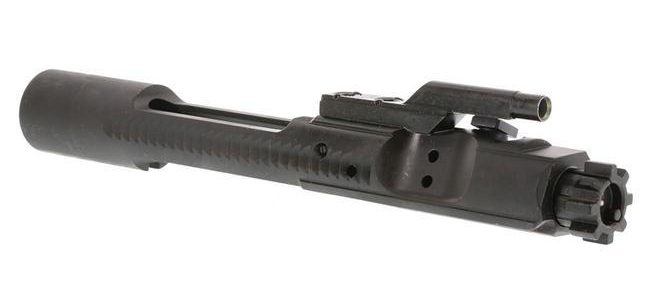
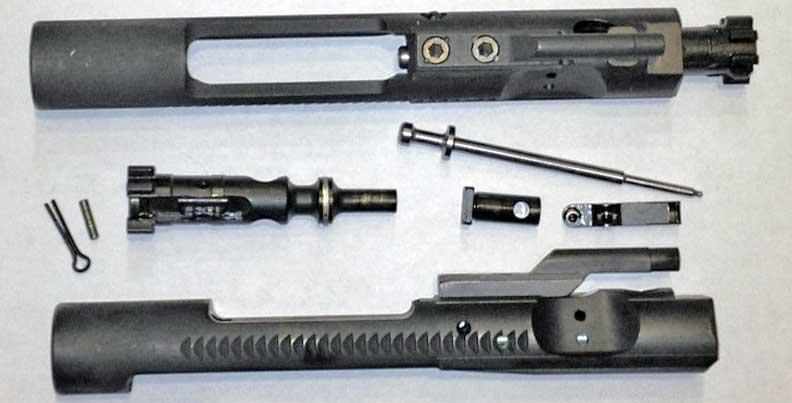
Which brings us to the second most important thing: the BCG (Bolt Carrier Group). As some of you probably already know, once your bullet passes the gas port in your barrel, a portion of the hot gases begin to flow into the gas tube and head for the BCG.
At the bolt carrier group, these gases enter the expansion chamber via the bolt carrier key and begin to exert pressure on the surfaces in the expansion chamber including the piston in the three-ringed bolt tail.
Pushing on the piston, these gases cause the bolt carrier to push back. The bolt carrier’s two drilled holes pass the sealing C rings on the tail of the bolt, causing ventilation of the hot gas. As the bolt carrier moves back, the cam slot at the top exerts pressure on the bolt lug, forcing the bolt to rotate into an unlocked position.
This is an integral piece of the puzzle because it prevents moving parts with a low mass from shaking vigorously, resulting in a smoother shooting experience.
No matter what BCG you use, be sure to stake the gas keys with grade eight fasteners. This will stop the hex bolts on your BCG from coming loose from the pressure of the gas.
Some people erroneously believe that any old BCG will do, suggesting that a dirt cheap BCG works the same as a more expensive one. Again, this is not an area in which you want to skimp. The BCG is the heart and soul of your AR and it’s imperative that it works properly.
BCG Prices
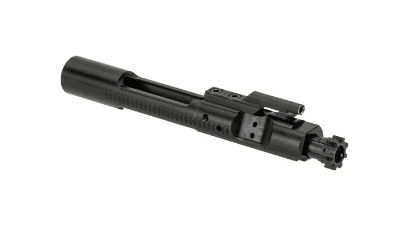
The reality is, all BCGs are reasonably priced. The highest quality BCG can usually be found for between $70 and $100. Personally, I would recommend Anderson Manufacturing .223/5.56 BCG. It’s just $119.99 and it’s got everything that more expensive models have. It’s chrome-lined and a steel bolt that’s coated with corrosion-resistant phosphate.
Anderson Manufacturing Complete M16 / AR-15 Bolt Carrier Group
Finally, you want to get your hands on some good handguards. While most uppers already come with handguards, some may not. In that case, a solid option is the Magpul MOE handguard. Even though standard handguards are generally cheaper, you’ll find that rail guards and the like are more accessory-friendly.
No matter which one you settle on, you’ll still be saving what you would have spent buying a pre-built AR-15 from an online retailer or gun shop.
Safety First Step in How to Build an AR 15
Before you get started, you want to take all proper precautions. You should be sure to wear safety glasses to protect yourself against flying pins or springs. The little buggers can easily spring up (no pun intended) and injure you or someone else.
Building a gun can be a dirty job what with lube and oil, so it’s a good idea to wear an apron. If you don’t have one, you can always wear some ratty old sweatshirt.
Since you’re dealing with small parts that will invariably end up falling on the floor, it’s important to keep a clean work area. Personally, I like to lay out a white sheet or drop cloth so that I can easily collect any rogue springs or pins after they’ve gone astray.
How To Build an AR-15 – Getting Started
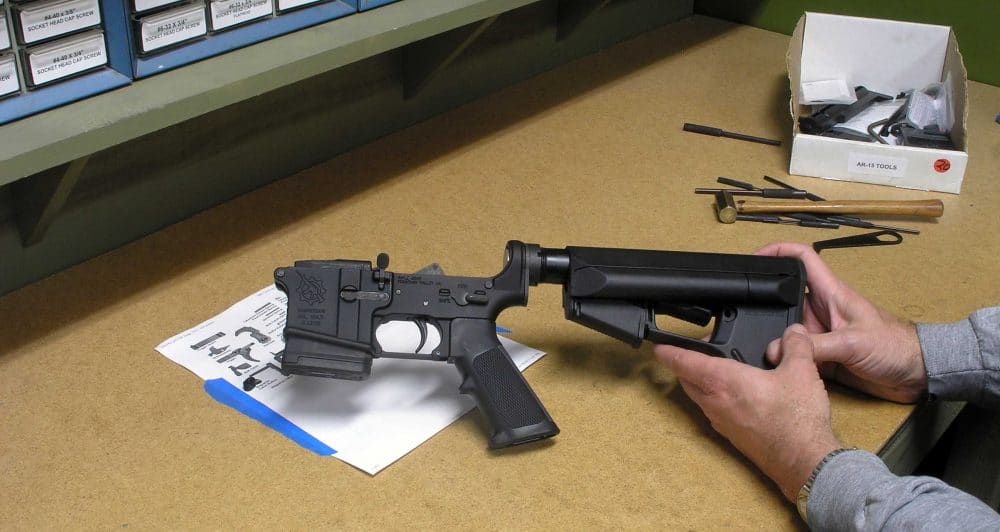
Once you’ve procured everything you need for your AR build, you’ll want to arrange all your tools and parts on your work surface. Make one or two rows for your tools and one or two rows for your parts so they don’t get mixed up.
Group your parts together in order of assembly.
How to Build an AR 15 – Step 1
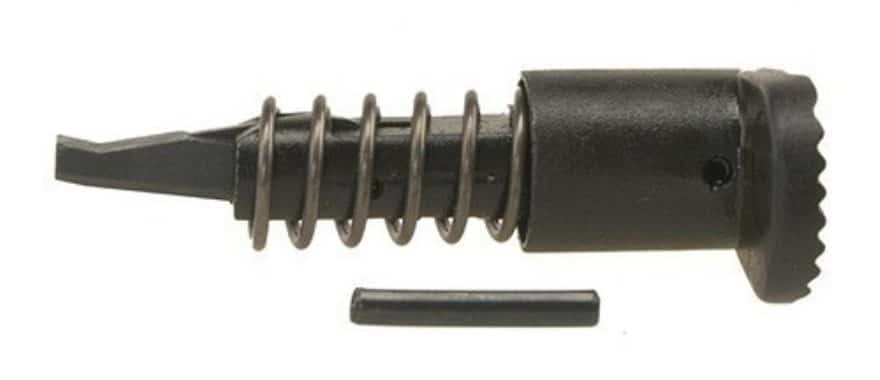
The first thing you want to do is assemble your forward assist on your upper. This will consist of your forward assist, your forward assist spring and your roll pin.
You want to turn your upper upside down so your Picatinny rail is flush with your work surface. Then you want to slide your spring in either direction and get your forward assist pin in the bottom of your upper so it’ll stand. Using a starter punch, drive a series of punches into the side.
Insert your forward assist assembly so that the pawl is flush with the middle of your upper.
Slide the assembly into the upper and compress the assembly. As you’re doing this, you want to simultaneously drive the pin into the assembly until it is flush with your upper.
Once this feels firm, you should be able to let go of the forward assist. At this point, you can drive a large brash punch into the pin.
Now you should be able to test out your forward assist to see if it moves with ease. If free mobility has been achieved, you’re all set with your upper.
AR 15 Ejection Port Cover Installation – Step 2
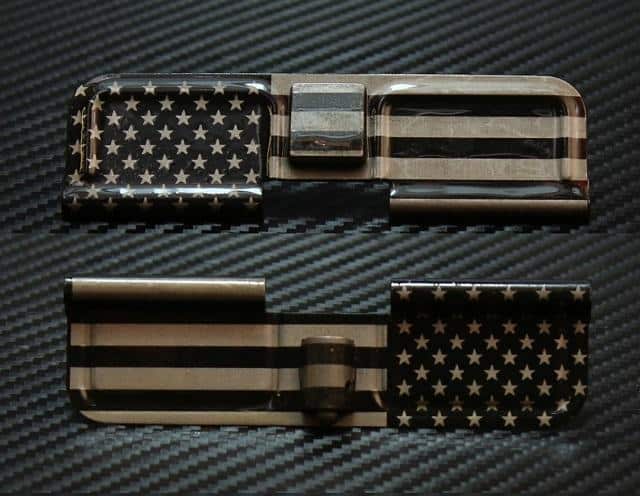
The next step is to install your ejection port cover. For this, you should have your ejection port cover as well as a cover pin, a cover pin snap ring and a cover spring.
You want to hammer your snap ring all the way on to your cover pin. Take care to make a precise, downward strike on the ring.
Place your upper on its side and so your port is facing upwards and begin the ejection cover pin. Start with the end that doesn’t have the snap ring.
Put the ejection port cover on your upper so that it’s open and align your cover’s holes with those of your upper.
Slide your cover pin through the hole closest to your upper’s barrel threads.
Now, hold your cover spring firmly in your left hand and take hold of the longer part of the spring that’s sticking out. You want to wind the spring a half a revolution away from yourself so that the spring faces you.
Holding the spring under tension, you want to put the long end on the right side of your port cover then slide the cover pin all the way through so that your snap ring stops you.
At this point, you should be able to shut your ejection port cover. You’ll know if you were successful if it snaps closed.
To test ‘er out, just push the ejection port cover to see if it snaps open. If it does then you’re ready for the next step.
Bolt Carrier Group Assembly – Step 3
BCG assembly should be a breeze if you’ve gotten this far. For this step, you should have a bolt, bolt carrier, bolt cam pin, firing pin and retaining pin. Again, most of these are available in kits.
First, you want to press the bolt into the end of your bolt carrier. Then you want to insert the cam pin into the hole in your bolt carrier. This is located right beneath your bolt carrier key.
When your cam pin is in place, you should rotate it a quarter of a turn so the holes in it are aligned with the front and back of your carrier.
Slide your firing pin through the bolt carrier and insert the retaining pin. You want the round end of your pin to reside in the largest side of your bolt carrier. Exact alignment can be difficult so be sure that the pin can slide freely before moving on to the next step.
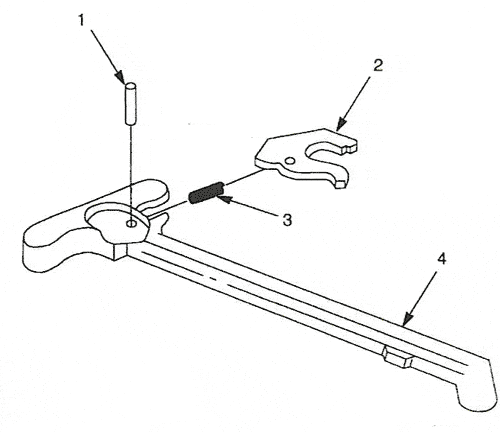
If all goes well, you’ll be ready to move on to your charging handle. You’ll need a latch spring for this. What you want to do right off the bat is place your latch spring inside of the charging handle and start a roll pin at the top of the handle.
As you compress the charging handle latch, just line up your holes and insert the latch roll pin. Once it’s flush, you’re good to go.
Bolt Carrier & Charging Handle
From here, you want to install the bolt carrier and charging handle into your upper. Sounds easy, right? Not exactly. This is where things get a touch more involved.
You’re gonna need to turn your upper upside down again and insert the charging handle assembly, carefully aligning the tabs on the handle with the grooves of your upper.
Slide the handle assembly just enough so that it’s inert, then pull your bolt out of the carrier to the point where the cam pin won’t touch the interior of your upper.
Now you’re going to insert the bolt carrier assembly into your charging handle assembly. You want both assemblies to be aligned, otherwise your unit will not be functional.
Push both assemblies into your upper so that they click into place.
At this point, you should be ready to insert your upper into the action block by tightening it with a vise. To do this, you need to remove your assemblies and slip your action block insert into the rear of your upper.
Shut your ejection port cover, put the upper into the block and shut the block. Then put the block into your vise and tighten without overtightening.
Outer & Inner Receiver Nuts
From here, you’re going to install the barrel in the threaded side of your upper and use a steel brush for coating removal on your barrel. Taking out your outer receiver nut and inner barrel retainer nut from your handguard, you’ll unscrew the two nuts from each other.
Coating the barrel threads with white lithium grease (I told you this job could get dirty) will prevent against galling.
Now guide your outer receiver nut on the threads until the nut touches the ejection port cover pin.
You want to unscrew the nut by a single rotation so that the gas hole is aligned with the hole on your upper.
Cover your inner nut with the aforementioned grease and attach your inner barrel nut, tightening it manually.
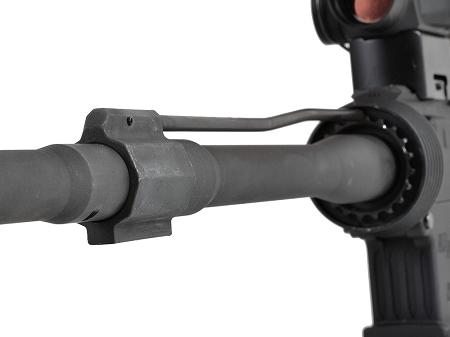
AR 15 Gas Block
Insert your gas tube into your inner, outer and upper with the three holes at the end where you’ll be placing your block.
Loosen the screws on the bottom of your block and slide the block so that it’s on the barrel and thread the tube into the block.
Tighten the screws just a bit so it stays stationary while you align the tube your block’s hole with the gas tube’s hole. Tighten the whole thing up and insert roll pin into block and tube alike.
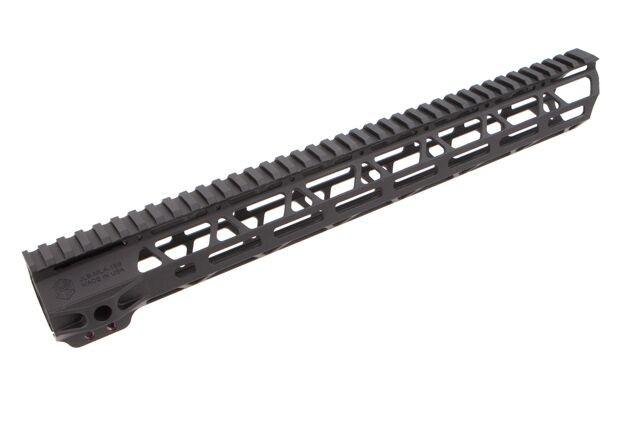
Customized AR 15 Handguards
As I mentioned earlier, you can always stick with standard parts for a budget build, but you might want to install free-floating handguards. If that’s the case, I’ve got you covered.
Just pull the delta ring towards the receiver and ease the standard handguard out. You’ll want a handguard tool for this because the spring is going to be under a lot of tension.
Remove your flash hider, separating your upper and lower. Also, remove your scope if it’s in the way so that you can get your upper in a vise.
Removing AR15 Gas Block
Next you need to remove your gas block and delta ring. This requires you to take out the barrel nut so have a barrel nut wrench on hand.
Once the delta ring and barrel nut are off, separate them and set them aside. Now you’ll remove the barrel snap ring with a pair of pliers. Then return the barrel nut since it will be the connective tissue of your free-floating handguard.
Use a torque wrench to torque the nut and test your gas tube, making sure it’s in alignment with your receiver’s port. If it’s a long handguard that you’re utilizing, you want to install a VTAC low-profile gas block.
To mount the handguard, you’ll need two clamshell braces to touch the barrel nut. Once those are installed, the handguard should slide in freely.
If you’ve done everything correctly, the handguard should be a firm, tight fit. You may want to insert screws to keep the locking lever in the right spot.
Custom AR-15 Parts & Accessories
If you’ve got money to burn, there are plenty of attractive pieces that you can pick up to trick out your AR-15. These are some of my personal favorites and I think you’ll find they are a great value for the $.
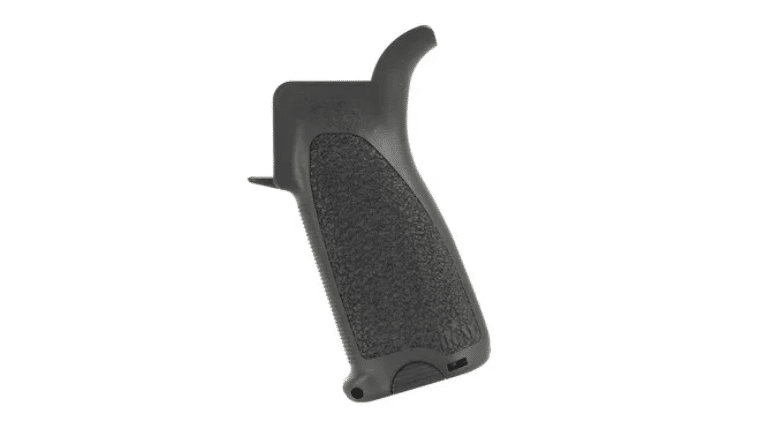
Pistol grips are among the biggest purchases for shooters who enjoy extended firing sessions. If you want a comfortable, customized grip, you can’t go wrong with the M16 grips offered by companies like Bravo Company USA and Hogue.
They’re relatively cheap at around 20 bucks and are very lightweight with ergonomic finger grooves.
Bravo Company Manufacturing BCMGUNFIGHTER Grip
Stippling is something that can add a nice texture to your grip or mag. Here is a handy video that shows you how to stipple your AR-15 grip at home.
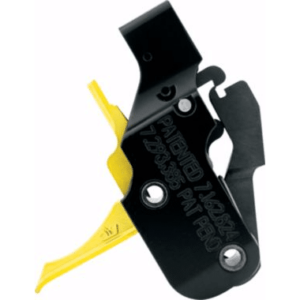
Aftermarket triggers are another consideration that can assist in upgrading your AR and maximizing your performance. If you’ve got the loot, I strongly recommend getting your hands on the AR Gold Adjustable Trigger.
AMERICAN TRIGGER CORPORATION AR GOLD ADJUSTABLE 7.62 FLAT TRIGGER
For under $300, you’ll obtain the cleanest break and shortest reset of any AR trigger. You’ll have a significant advantage over other competitive shooters.
Ambidextrous AR15 Parts
Ambidextrous safety selectors are something that most southpaws will appreciate. A variety of companies offer ambidextrous safety selectors, but in my experience, you can’t go wrong with those manufactured by Battle Arms Development, Inc.
They’re made from heat-treated steel and come with deeply grooved levers. They can also be customized by applying high-visibility paint.
Anti-rotational pins are one of the more obscure customizations for an AR, but they’re an exceptional upgrade. They’re stronger and longer lasting than standard mil-spec pins. KNS Precision has a terrific non-rotating pin set for $29.99 that prevents wear on your receiver holes.
There are so many things you can do if you want to. From nickel-coated bolt carrier groups to long-range lights and sling mounting hardware.
Basically, you can customize almost any aspect of your AR-15 if you have the time and resources. Whether it’s a custom stock or advanced optics, the possibilities are endless. When I created my own AR-15 build at home, I pimped my AR out with a custom Vortex ® Flash Eliminator from Smith Enterprise, Inc.
How to Build a Customized AR 15
Now that we’ve gone over how to create a budget build, let’s talk about more top of the line builds. If you want a custom precision rifle, it’s a lot easier than you probably think.
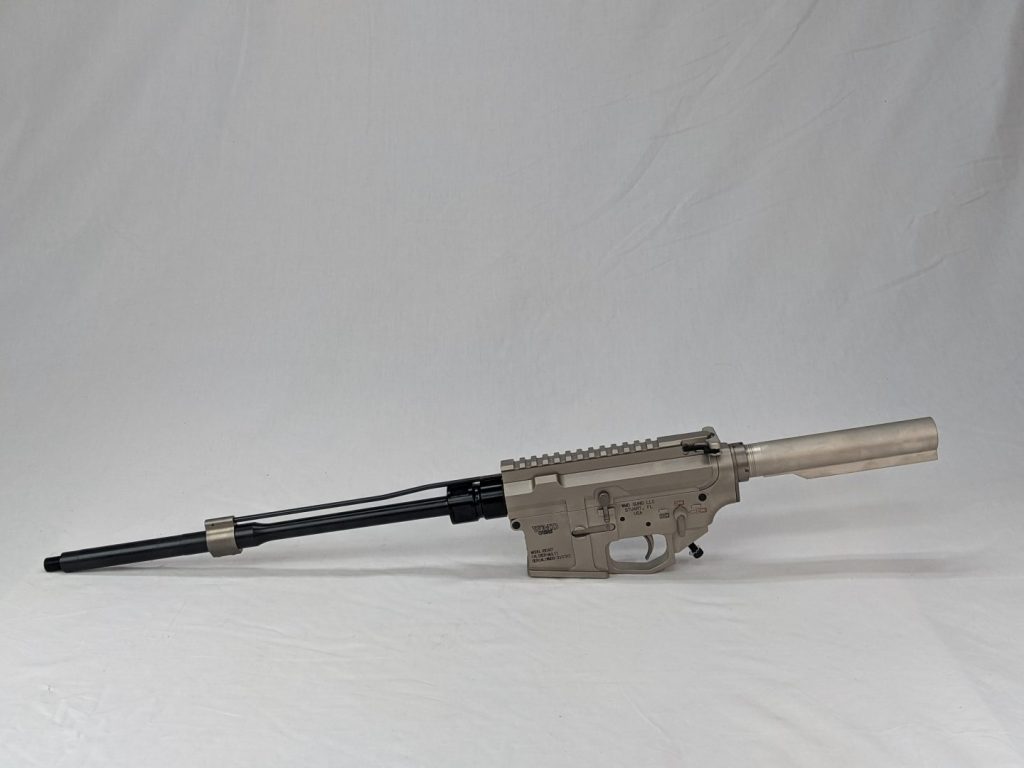
Simply purchase a quality AR chassis and single-source your furniture. For instance, you can pick up a WMD Beast Billet chassis and add grips, muzzle device, pistol grip, barrel nut and handguards.
NiB-X “Big Beast” 6.5 Creedmore Billet CHASSIS
With the WMD Beast, you get a grip screw, safety selector detent, lock washer and detent spring. Pretty much all the little components you’ll need for your build. After you’ve selected a six-position shoulder stock, you can slip it right in without the need for any fancy tools.
After that, all you’ll need is a muzzle device and a barrel nut and you’re good to go. The best option for a luxury model would be the Rise Armament RA-701 Compensator, a recoil-repelling stainless steel muzzle device that’s perfect for the Beast’s match-grade barrel.
Best AR-15 Furniture
For the absolute best overall furniture. I can’t think of a single company that can trump Magpul’s line of parts and accessories. Whether it’s their mil-spec buttstock or their MIAD pistol grip, Magpul’s furniture is awesome.
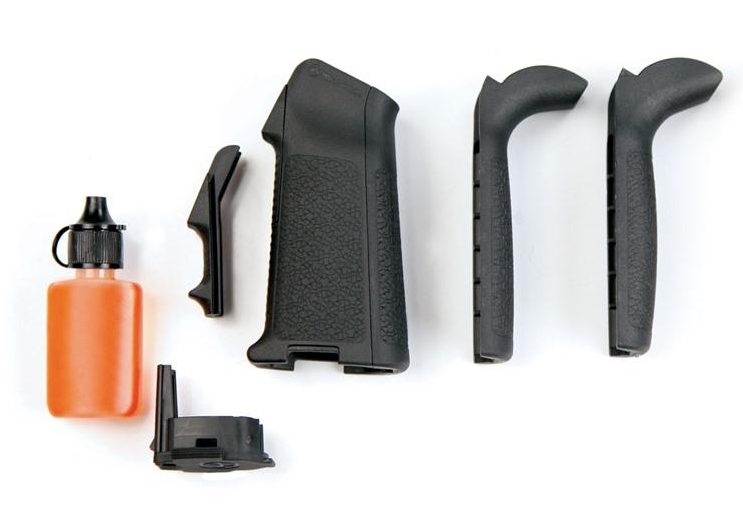
The MIAD Gen 1 AR gun grip kit sells for around $35.99 and offers an ideal grip. It has a handsome pitch black finish and an internal oil bottle that can be swapped out for other cores. Additionally, it has removable straps for customization.
For a good collapsible stock, you can’t go wrong with Magpul’s UBR Gen 2 collapsible stock. For just under $200, you get adjustable length of pull and a solid cheek weld. It’s multi-positional and provides superior consistency.
Other items you’ll want to consider include rail covers and sling plates. The good news is, these are relatively cheap, even when you’re looking to create a custom AR build. Brownells sells Magpul rail covers for $11.35 while Cabela’s has an ambidextrous sling attachment for $29.99.
For quick detach swivels on your slings, Magpul’s ASAP Sling Plate will give you a serious tactical edge, providing 180 degree sling movement and is easily installed by removing the factory receiver.
How To Build an AR-15 – Closing Thoughts
So there you have it. That’s pretty much everything you’ll need to know in order to do a fast and smooth DIY AR-15 build. Remember to keep key factors like barrel and BCG in mind when budgeting for your own AR build.
If you’ve read this far, I trust you’ve got a bedrock understanding of how to do a DIY build of your very own homemade AR-15. I hope this post has been informative and helpful. If you’d like to learn more about the AR-15, you can read about its history and evolution right here.
If you think I left anything out, please let me know. I relish feedback from my fellow gun lovers and aim to give you the most comprehensive info on these subjects. Thanks for reading and happy hunting.





8 Responses
you casually mention building an AR with a barrel length of less than 16″ and do not mention any of the legal risks/SBR requirements….this could lead to someone building an illegal pistol/rifle
no one cars man, you can build a 7 inch rifle for all i care and as long as it doesnt have a buttstock or has a stabilizing stock its not technicly a rifle
What was your final
Cost?
“”When I went with the basic tools for the job, I ended up spending under $200 and completed my build in a small window of time. It is not uncommon for a home build to take eight hours or more, but when you go with the bare essentials, you’ll see quicker results.
By breaking it down to the fundamentals, I was able to create a ready-to-shoot AR-15 in just under 90 minutes. And that was after lubricating everything””
Did you mean you spent $200 total on your build or just the tools? If its total, id like your personal complete list of things you bought.
You say you’re a firearm enthusiast, yet your story left a lot to be desired by new or first time owners wanting to build an AR-15.
First, please check your wording. Some words were spelled correctly yet were the wrong word for the context.
Second, though this seemed like an ad for Magpul and PSA, I understand you are trying to get people interested and involved in the firearm community. Maybe next time provide some realistic ideas of what is needed and what alternatives are available. I.e. an average build can be done in 30 minutes not 8 hours. Or that most of the items can be gathered pre-assembled. Or that many if the tools can be purchased at the hardware store for less.
It was a decent article for mid-entry level folks, though it would possibly scare a few new folks away.
Keep at it and we will help you get better.
Excuse me Rick:
Do you want to build an AR or are you more interested in grammar and spelling? I am confident there are other articles on this subject that would also provide insight and possibly better answers to questions you may have that were puzzling you here. READ! LEARN! Isn’t that what the internet is for?
I agree with you, Rick. My first two AR builds were 95% Mil-Spec. I didn’t buy any so-called Tactical Cool parts of designer name parts at all. Being a machinist for many years and making various parts from almost any material you’ve ever heard of and working to close tolerances, the term Mil-Spec doesn’t mean the parts are substandard. Everything made in a machine shop is 100% made to blueprints and within manufacturers tolerances. If a person wants to pay 3 or 4 times the price for fancy named parts doesn’t guarantee the AR they build is going to function 3 or 4 times better. At the end of the day, the AR you build just has to work.
Sorry, I should’ve added this to my comment before posting it.
As for fancy tools, most guys who work on their cars will have almost everything you need to build an AR-15. After watching several videos on youtube, the only special thing I bought was the vise block that fits into the Mag well. I had a torque wrench to tighten the floating hand guard barrel nut, but I did have to buy what looks like a stubby open end wrench to fit my 1/2 inch drive torque wrench. I hardly spent anything on tools. But a non mechanically inclined person would have to spend an untold amount. The most handy thing to have is a rugged bench vise.